
In order to decorate houses for festivities like Christmas and Halloween, the article explains how to connect small 12 volt flashlight bulbs into colorful string lights.
String Light Definition
A string light, as its name implies, is a wired lamp installation where several lights, which include LEDs or bulbs, are connected in series to resemble a string or thread.
The purpose of the series hookups is to verify that the voltage value meets the lamp requirements and to distribute the supply voltage evenly among the lights.
In the Indian subcontinent, string lights during Diwali and Christmas are also commonly referred to as TORAN.
The fundamental idea and all of the wiring information for these TORAN lights, also known as string lights, are explained in a very easy-to-read manner in this article.
We're going to talk about a very basic setup in this post that uses regular tiny incandescent flashlight bulbs to create string lights that run on AC mains.
Even though the wiring seems quite simple, certain calculations are undoubtedly involved.
It would be helpful to understand the general idea before delving into the specific connection specifics of the various designs discussed below.
How to Wire Flashlight Bulbs
Among all electrical wiring, a flashlight is the most basic and ubiquitous type.
A few batteries, a tiny incandescent lightbulb, a switch, and the necessary connections are all included in the arrangement, as seen in the figure, to form the flashlight circuit.
The interoperability of the various components included is one of the few crucial factors to be considered in the wiring shown above.
It is clear that the bulb must likewise be characterized at or near this level because the two batteries connected in series provide a potential difference of three volts. As a result, the bulb's voltage is determined to be three volts.
In order to get optimal results and prolonged lighting, the battery's current, which is another important component to take into account, is matched with the bulb and measured in Ah (Ampere Hour).
Imagine a bigger flashlight that has four of these 1.5 volt batteries in it. The total potential difference that would result from these cells would be six volts.
This would take a 6 volt bulb because the above 3 volt bulb will be drained in a matter of seconds and not reach its full capacity, which is twice the bulb's highest rating.
Nevertheless, if you were interested in using a 3-volt bulb with the previously mentioned 6-volt, the calculations would say that you would need to connect two of them in series to get a voltage of 6 volts across them with no problems.
It is then essentially only a matter combining the lightbulbs in series to ensure the total equals or approaches the applied voltage across the associated load or the lightbulbs.
It should be emphasized that the kind of current used has no influence on incandescent bulbs or any other resistive load.
As a consequence, the computations or actually the outcomes are identical regardless of whether it's an AC or DC.
TORAN Lights Using 12 Volt Torch Bulbs
In order to construct the recommended string lights using 230 volt AC mains, we utilize the previously mentioned idea.
Our choice of light bulbs is 12 volts as opposed to 3 volts to help keep matters tidy and prevent excessive wiring clutter.
If three-volt light bulbs were used, it would be 230 −3 = 77 numbers, which is a massive amount and implies creating a ton of connections.
We prefer to utilize 12-volt devices over larger ones since dividing 230 by 12 yields about 20 light bulbs, which is a reasonable number when it comes to joining them all together.
Parts Required
- Wire – 14/36, 10 meters or as per the required length.
- Soldering Iron – 25 watt, 230 volts,
- Solder wire – 60/40, 18 SWG,
- Solder Paste also called flux.
- Light Bulbs – 12 volts, 100 mA torch bulbs or similar.
- Two pin plug – 1No.
Construction Procedure:

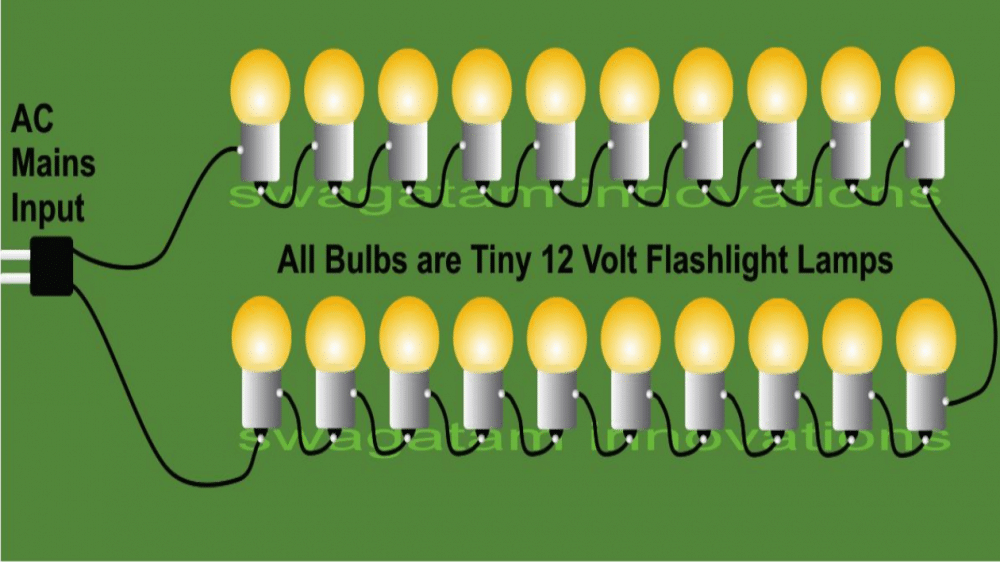
The above string light circuit schematic makes clear that the bulbs are only wired in series, end to end in a sequential fashion, up until two wires emerge from the "string" and are linked to the mains AC line.
The bulb's metal cylindrical body typically serves as one of the connections, while the bottom soldered point serves as the second electrical ending.
There are just two locations on the wires that require soldering.
Although the sections must be thoroughly scrubbed with sand paper in order to get optimal soldering outcomes, the solder paste itself suffices to make the soldering without requiring significant cleanup.
The wire sections must first be cut and stripped to the appropriate length. The wire extremities can subsequently be immersed in solder paste and soldered on the designated regions by instantly contacting the wire end and the hot tip of the soldering iron that is loaded with melted solder.
The wire end should be securely held in place by keeping the tip in place until the solder hardens, which will sizzle.
Utilizing the aforementioned procedures, conclude the assembling process to ultimately construct the light string or toran.

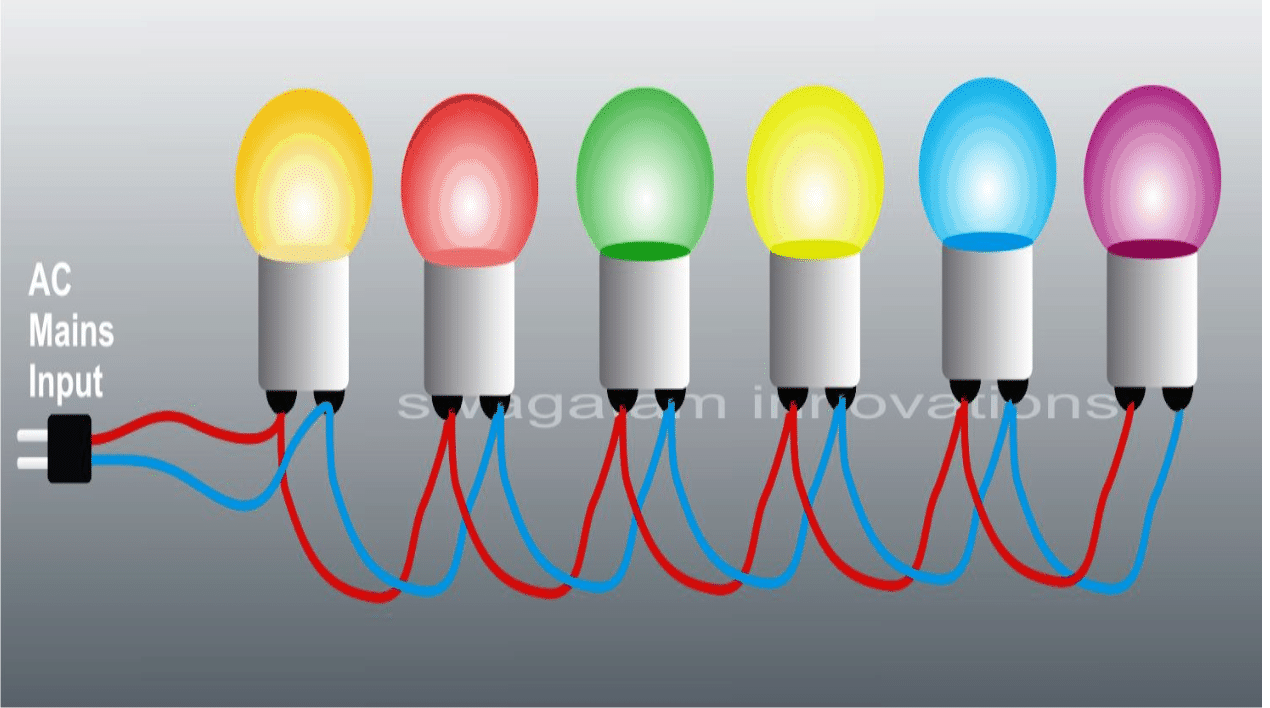
A few colored lightbulbs that are rated at the Mains AC level can also be used to create the toran.
Here, the lights just need to be connected in parallel, not in series. For additional ease, make use of holders. The incorporation of bulb holders essentially eliminates the necessity for soldering.
Warning: Due to the fact that the string light operates at AC maximum potential, all open parts of the bulbs should be wrapped or effectively concealed with insulating plastic caps or identical housings. Failure to do so may cause an electric shock or possibly even death to anyone who comes into contact with it while it is in a powered position.